Tampilkan postingan dengan label Nursery. Tampilkan semua postingan
Tampilkan postingan dengan label Nursery. Tampilkan semua postingan
Selasa, 08 Agustus 2017
Twin Nursery Progress
It has been a while since I have done a nursery update so I thought I should share some pics of our progress! You might have seen on Instagram, but we have done a ton since the last post regarding the cute purple closet.

The first big change was the cribs arrived! My parents got us these adorable Jenny Lind cribs and I just love how they look in here. We have already rearranged, too.

They have been my storage spot for all the cute crap I have been hoarding to decorate with.

Then Nate started the amazing cloud decals! I am obsessed with how these look in here! He is such a perfectionist and so good at things like this - it took him days, but it looks perfect!


Bradley likes the clouds, too. ;) He loves their cribs as well! He always wants to go in his sisters' room.

Some of my Instastories regarding the nursery decor:


And a not as fun Instastory. :( I can at least get (and keep) my pills down now! I had to add iron/vitamin C because my iron was super low at my glucose test. Not good for twin (or any!) deliveries...

I posted this pic because I couldn't decide if the girls needed one of each stuffed animal (top row), or if it looked cuter paired together (bottom row). I went with one of each. I'm sure they will care so much. :)

Organizing all the stuff!

One of my good friends sent us two of these adorable Skip Hop unicorn backpacks and Bradley is as obsessed as I am! :) I'm looking for cute hooks to hang/display them in the purple closet. Anyone seen a rainbow or unicorn hook or anything like that? We have a flamingo hook and need one more. Thanks Erica!


Adorable outfits from my friends Elizabeth and Kaylan! Obsessed! Why are girl clothes so stinking cute?


One wall we have been able to finish is the dresser wall! This dresser is already anchored to the wall so it isn't going anywhere.


We are waiting on decorating the other walls because we need our recliner to arrive. It is late (grrr) but supposed to arrive this week now. Come on recliner! Mama needs a place to sit!

Nate surprised me with the pink light box and cute end table for Valentine's Day. Love!


We also tested out our stroller for the twins. We were almost positive before even testing it that we were going to get the newer Uppababy stroller since we love our current Uppababy stroller for Bradley (and I still use all the time). We had to upgrade because his older version doesn't allow for two car seats, and the newer version does.

So we ordered! Brussels Griffon approved! :) We also ordered the little skateboard thingy for Bradley to stand on at some point. I don't think there is a chance in hell he would hold still and use it now, but hopefully someday. :)

As for me, I'm surviving! I made it through busting my tail bone before Christmas and being in awful pain for a month with that, then the horrific few weeks of what my doctor thought was PUPPPS, and a dermatologist said was an atopic eruption of pregnancy (but pretty much the same thing) by treating with a steroid cream. That was some of the most awful days of my life! Then I got super sick from my TDAP shot and was out for a good 3-4 days. Now I am just taking it easy carrying all of this extra weight around (I think last visit I have gained 45 lbs so far) and trying not to roll an ankle or something. I thought carrying one baby was painful...OMG. My pelvis and back hate me!! I can't sleep that well at night because of discomfort and peeing every hour but I have been trying to get a little daytime nap when Bradley naps. That also means my work gets pushed to the evening which isn't awesome but I am doing what I can! :)

Chimi has been loving my big bump and immobility.

And I have been trying to keep up with the weekly bump shots! I hate how I look in every pic so it isn't fun but I'm guessing I will be glad to have these someday.

Thank God for filters.

Definitely not as great at taking progress pics this time around but at least I snapped one! :)


So that is where we are at! So close! I am at 31.5 weeks now so we hopefully have 6.5 weeks left but I know twins can arrive at anytime so we are doing everything we can to be ready!
Follow me on Facebook and Instagram!

Kamis, 22 Juni 2017
Baby Boy Nursery How I Applied My Wall Decals
Instead of doing one huge 'reveal' post for baby #3's nursery, I think I want to break down the various projects a bit more in detail as we go. Of course, this would be a lot easier if I didn't have to be careful about sharing his name which will likely be plastered all over his room eventually. I think I can handle sharing bits and pieces without giving too much, though;) Sometimes I forget that my love for DIY crafty projects is not something we all universally share. A lot of the 'how to' posts on this blog seem to be helpful for readers out there, so I'm hoping that breaking each project down into 'what worked for me' posts will be appreciated. If nothing else, I can refer back to these posts to remind me of the headache each project really was in real time!
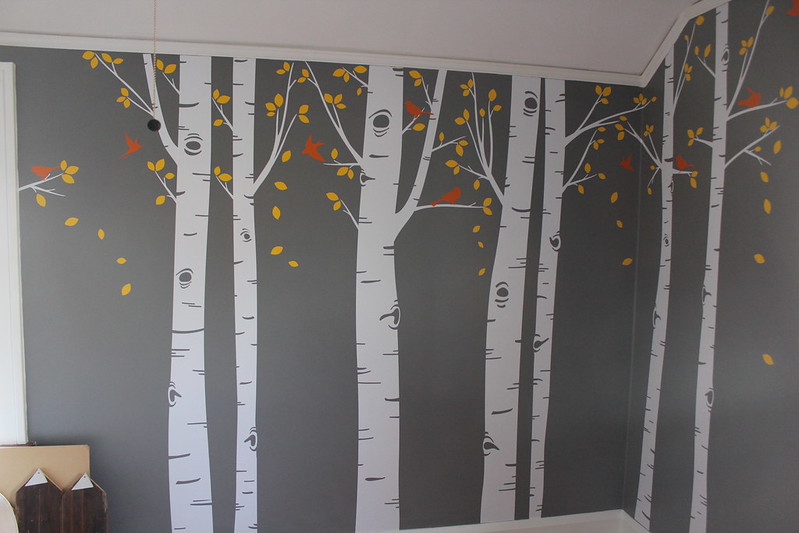
First up: his birch tree wall decals. I think these are going to be a major focal point for the room and because they took five times as long as I expected, I think it's worth a blog post to commemorate.
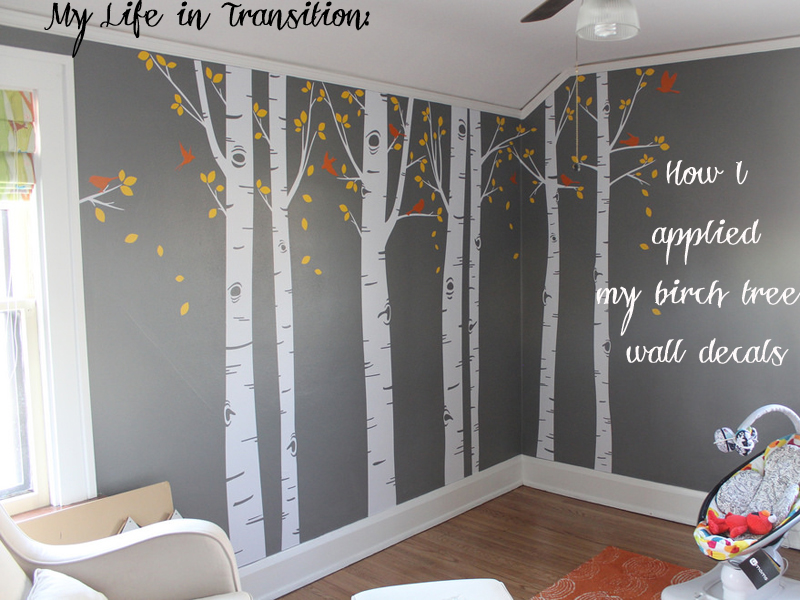
After doing a lot of Pinteresting research on the numerous options for birch tree decals on Etsy, I ended up selecting this version from InAnInstantArt. There are 7 birch trees, 9 birds, and seriously 100 leaves. I liked having the option of picking three total colors instead of just two colors, so that it could pull together both the yellow and the orange I had planned for his room. I knew I wanted bright white birch trees, more than one color after that, and really liked the style of this seller's trees. So with shipping and everything, this set was $109 total and took a few weeks to arrive at my doorstep.
I also loved this version with owls and an adorable birdhouse, since it allowed for 3 colors, but I thought maybe it was too juvenile (for a nursery.... I know, I don't make sense sometimes) and wanted more trees. This was another favorite since I love how the leaves are all very high and clustered together, and I'm pretty sure this pin was what inspired me to try a few 'falling leaves' on my wall. This one was also really cool and simple/clean, with adorable birdhouses. In the end I'm very happy with the version I chose but there are SO many other options out there! I read a lot of reviews on Etsy, too, to make sure my seller was highly rated and that the process would be relatively painless for application. And that the decals would actually stay on our plaster walls....that would be awful to see them peel away after a few weeks or something!
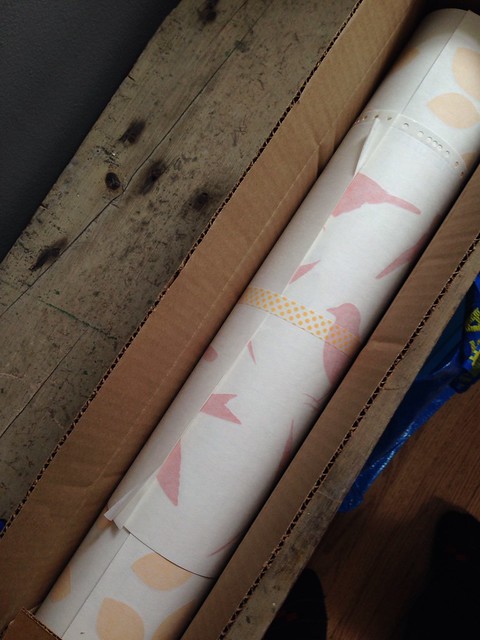
When my package arrived at our doorstep, I was seriously pumped up and took the box to the nursery immediately. I remained very excited until I finally pulled all of the sheets out of the box and laid them down on the floor. Seriously. Overwhelming. Not really sure what I expected but these decals seemed huge and daunting and like I would never complete the task of application. Then I read the instructions and found them to be three pages long and started muttering curse words under my breath. I think I was picturing something I could just peel off and stick onto the wall, but not so much!
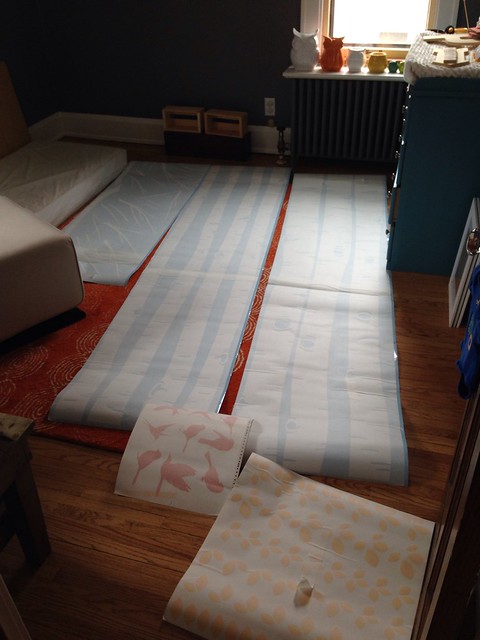
Next step: of course I Instagrammed my mixed emotions about the project ahead of me. I had a few suggestions, including a lot of girls who said this would require two people to complete. Since I knew Nate would be gone until 9:30 pm that night and I had about an hour to spare before picking up my kids from daycare, I figured it was going to be a solo project in the name of getting it done STAT. I just get anxious to see the vision come to life and felt up to the challenge of doing this alone because I'm impatient. And I truly had no idea when Nate and I would be able to devote time to this project together, sans kids.
I read the instructions a few times and decided to just freaking go for it (#impatient) my own way. I cut out all seven of the birch trees so that I could place them all individually on the wall without the backing. Again, I just dove into the process and tried to picture how I would space out the different trees, which were all different widths.
I started at the baseboard and peeled away the non-sticky, blue backing paper as I pushed the decal itself and the sticky, white transfer paper onto the wall. Lucky for me, the trees are all a little crooked and you don't really need them to be 'perfect' when it comes to lining them up. I did try to make the base as straight as possible against my baseboard, though. These trees are all 101" tall which is more than I needed, so when I got to the top of the wall I just cut the decal off with a little to spare above my crown moulding.
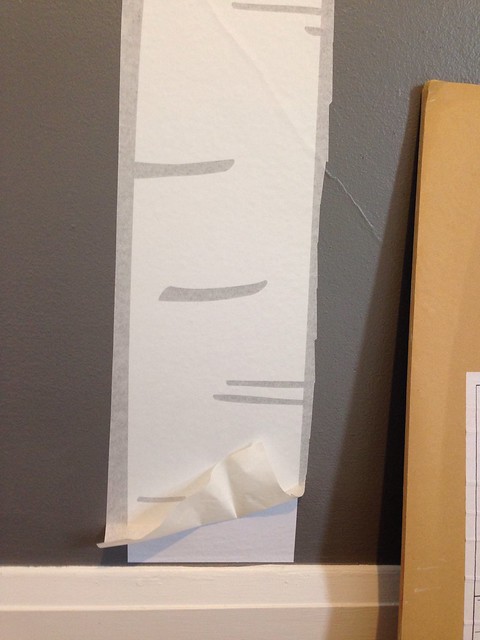
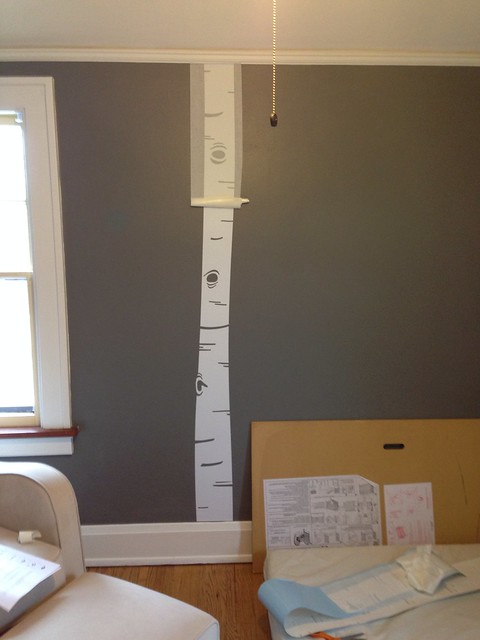
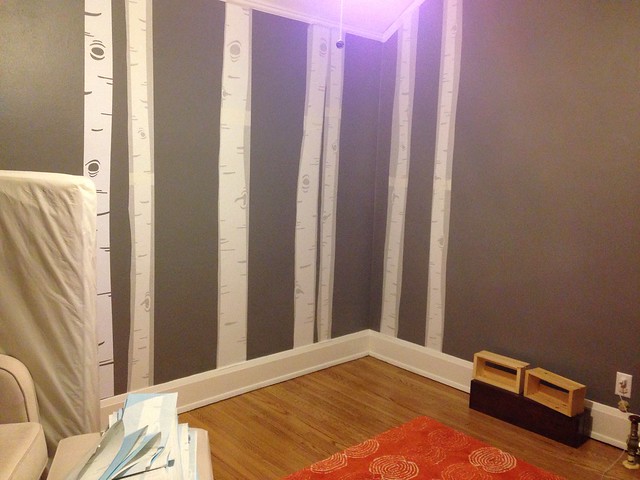
Once each tree was stuck to the wall along with the transfer/sticky paper, I went back over them and pushed them down with all of my might. So basically I rubbed my fingertips raw within minutes since our plaster walls are sort of textured. Once I was sure that they were not going to sag right off the walls, I started the painstaking process of removing the sticky white paper from the decal itself. This was not easy because the transfer paper is sticky and therefore stuck to the decal itself---which I guess is the point, so that it holds the decal in place on the wall first? I don't know. But I figured out the way that worked best for me---which was not at all what the instructions recommended.
I found that pulling the sticky paper directly up towards the ceiling while rolling it away from the decal would keep everything in place the best. If I tried pulling the paper away from the wall, aiming it towards me at a 90 degree angle, it would pull the decal too much and wouldn't work correctly. But rolling the paper up, right against the wall, aimed to the ceiling worked well. I would push the decal down with my fingers as I rolled the paper away. The little birch bark cut outs were challenging but were easier to manage with practice. I also had one of the $1.50 squeegees that the seller offered to help smooth out any air bubbles in my decal. That was fine but I preferred my (raw) fingertips.
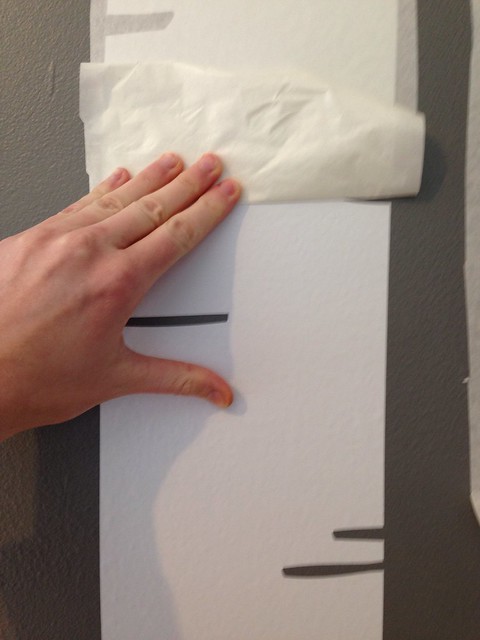
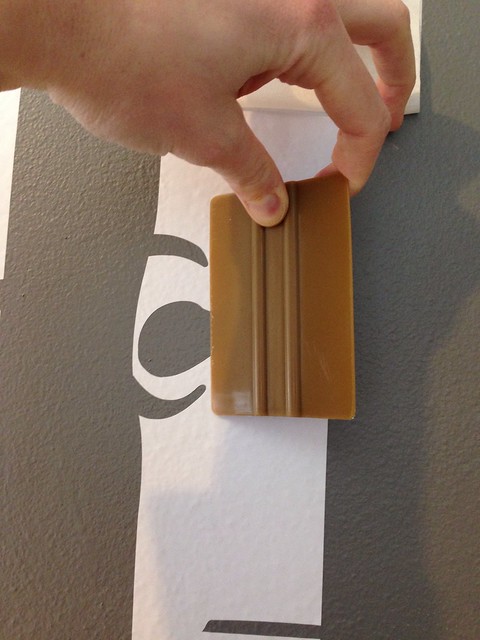
Working my way from the bottom to the top of each tree was okay, but later on I discovered that going from the ceiling to floor was probably better. Both ways sort of sucked and my shoulders/neck were really sore for a few days after this. But! Once the seven tree trunks were on the wall? Glorious. I decided to wrap the trees around to the second wall, since they will surround the crib a little bit more like this. I could have just done the main wall with all seven trees but like the effect of surrounding my little guy in a forest.
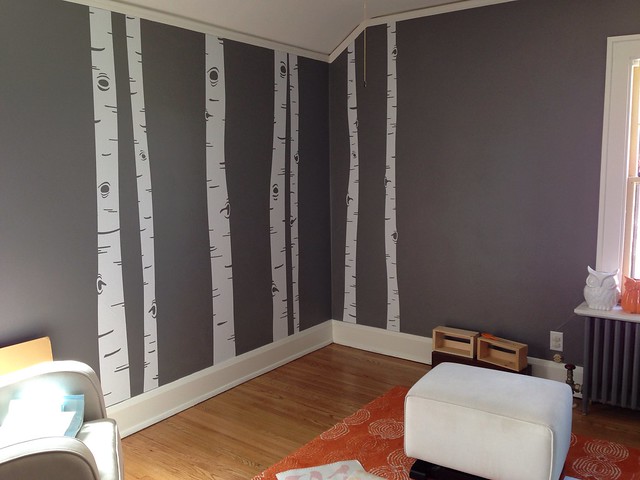
I just had to use the end of my scissors to cut off the top of the decals at my ceiling and then I went back over each tree trunk with my hands to smooth them out. Honestly, even just doing the trunks without any branches or leaves or animals would have been really cute. But of course I had to use all of the decal set provided to me for the full effect in this nursery, but maybe even for our master bedroom someday---just tree trunks would be great.
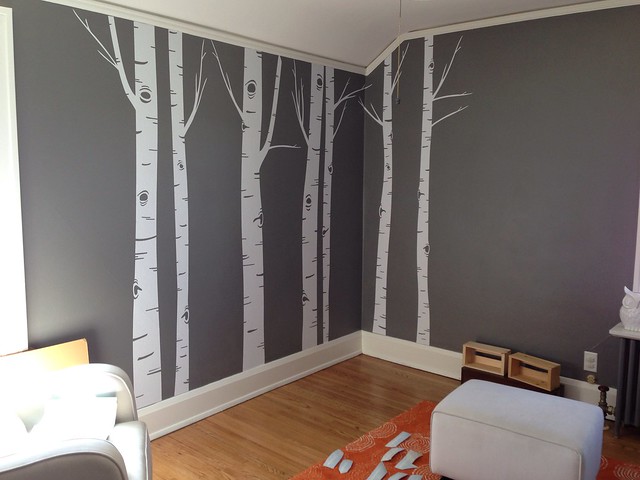
Next came the branches. There were a LOT of branches and I didn't even use all of the smallest ones. I started with the two really big branches, after cutting most of them away from each other. I put the branch where I wanted it on the wall, peeled away the white sticky paper, and that was it. MUCH easier than the larger trunks, thank goodness. Then I started adding smaller and smaller branches to each of my trees. This was easy as far as actually applying the decal. Just hard to decide where to place them---definitely a creative process! I liked some of the options on Etsy that showed branches being up very high on the trees, instead of going all the way down half of the trunk. I tried to keep it fairly balanced without being too perfect or symmetrical. This part was really fun for me and I had a lightbulb moment about the name of my Etsy seller. It *is* sort of like creating art on your wall....just not in an 'instant.' Ha.
Then came the leaves. Because there were seriously 100 of these babies, I think I was most overwhelmed with them. But most were arranged in clusters of 4, 3, or 2 instead of being all individual. I cut out most of the clusters from the rest and left the individuals on the blue backing paper. I could even peel each leaf off the sticky paper with my fingers and just apply it to the wall without using the paper as a guide. That was the nice thing about the small leaves---very easy to stick on the wall.
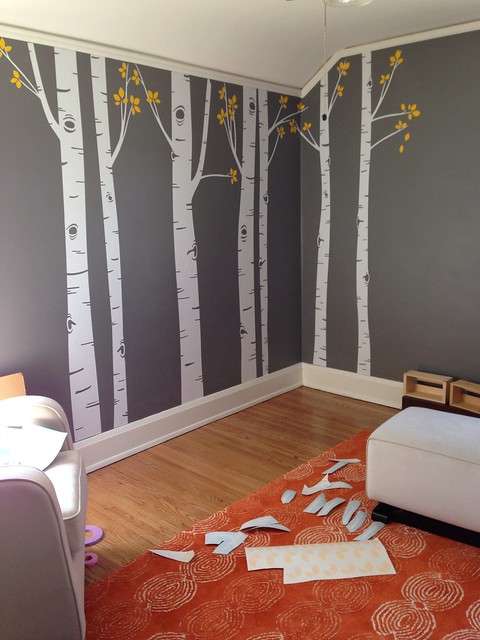
I started with the quadruplets and applied those first, then did the triplets, the doubles, and finally added a few random single leaves. Eventually I re-did the leaves and removed all of the foursomes---it just felt like too many leaves by the branches to me. This part was also pretty fun since there is no right or wrong way to do it! I knew I wanted a few leaves falling from the branches, and it was Nate's idea to make a little branch popping out of the window frame with leaves. Great touch, Nate!
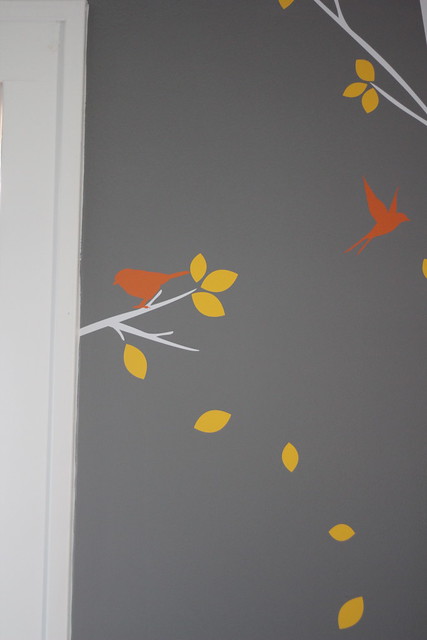
Finally we applied the nine birds and Truman/Nate both instructed me where to place each of them. I mostly just wanted them to be balanced across the trees and was glad some of the birds were obviously flying in their silhouettes. The flying birds and the falling leaves are two of my favorite parts of the layout---something about showing movement or making it more whimsical versus static?
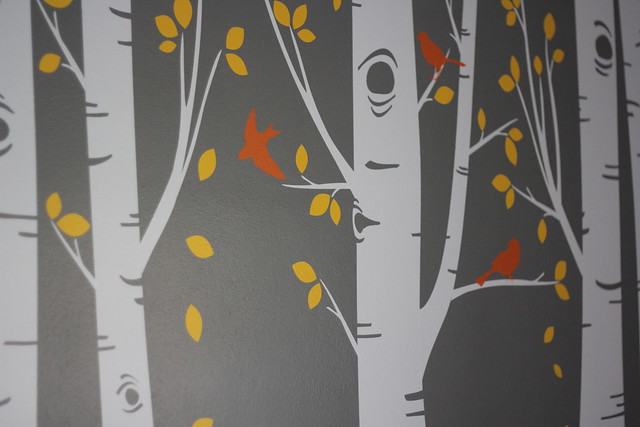
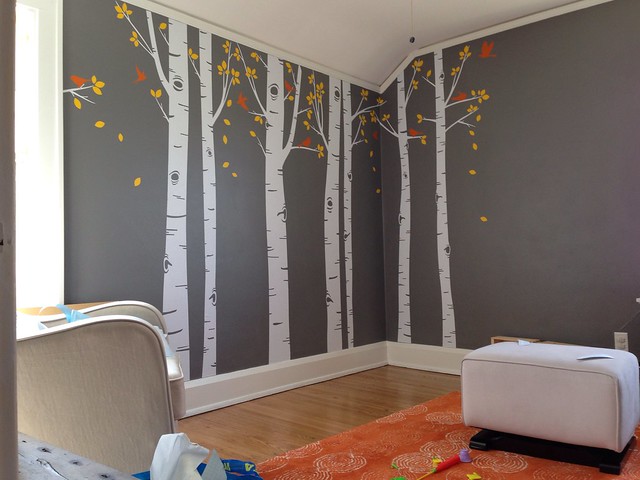
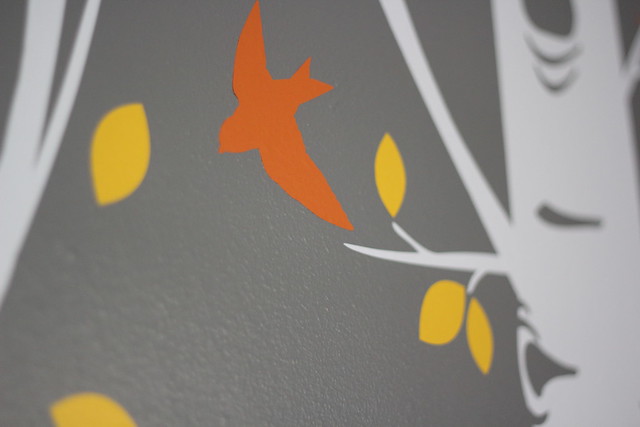
The entire process took somewhere between 6-8 hours I'd say. I lost track. But really, it was only Friday through Sunday so not *that* bad, since I prefer most of my projects to take no more than one weekend;) I did it all myself except for the suggestions given to me by my boys at the very end.
Nate's first question was 'if they are this hard to put on, are they going to be difficult to take off?' The answer is 'no', they will be easier to peel off but I DON'T plan on doing that ever! Seriously. If CC uses this nursery someday for herself, and the boys share Truman's room, Cecelia will just have to like the decals for her own room.
End result? I love it. Just how I pictured if not a little bit better.
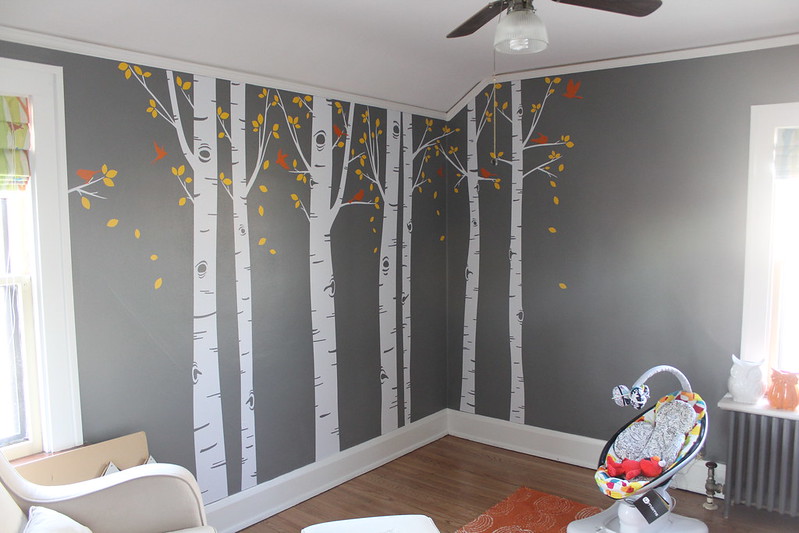
Next up? Painting the pink crib yellow this time. Hint: I took a yellow decal leaf with me when I picked the color for the crib. And re-painting it was much, much worse than I remembered.
Langganan:
Postingan (Atom)